2 Steps To Make Your Kitchen Clean And Organized
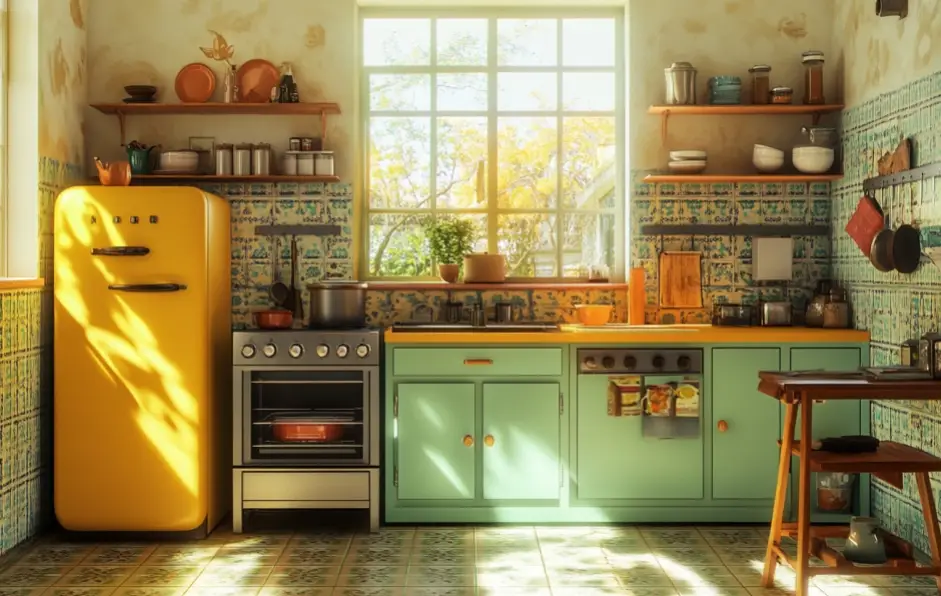
PHOTO: Yueke
The kitchen is truly a magical place. Even for those who don't cook, most people still desire a beautiful and tidy kitchen. Here's a storage rule: think of the kitchen as a large collection box, and based on the size of each item inside, you can follow these two steps:
Step 1: Organize by Workflow To keep your kitchen from getting cluttered, the primary consideration isn't storage space but layout. Only when you have clarified and planned the workflow and procedures in the kitchen can you effectively place and store items. For example, you don't need to fetch seasonings while washing vegetables, and after chopping vegetables, you should be able to easily transfer them into the pot. Common kitchen workflows and corresponding areas include: material retrieval, washing, chopping, cooking, and plating.
Therefore, the main idea of kitchen layout becomes very clear:
The easier it is to access and clean the tools in each corresponding area, the more convenient it is to put them back in place. This habit of easily returning items to their designated spots greatly aids in developing good storage habits and maintaining cleanliness. When things pile up and become messy, it's often because items were not promptly returned to their proper places.
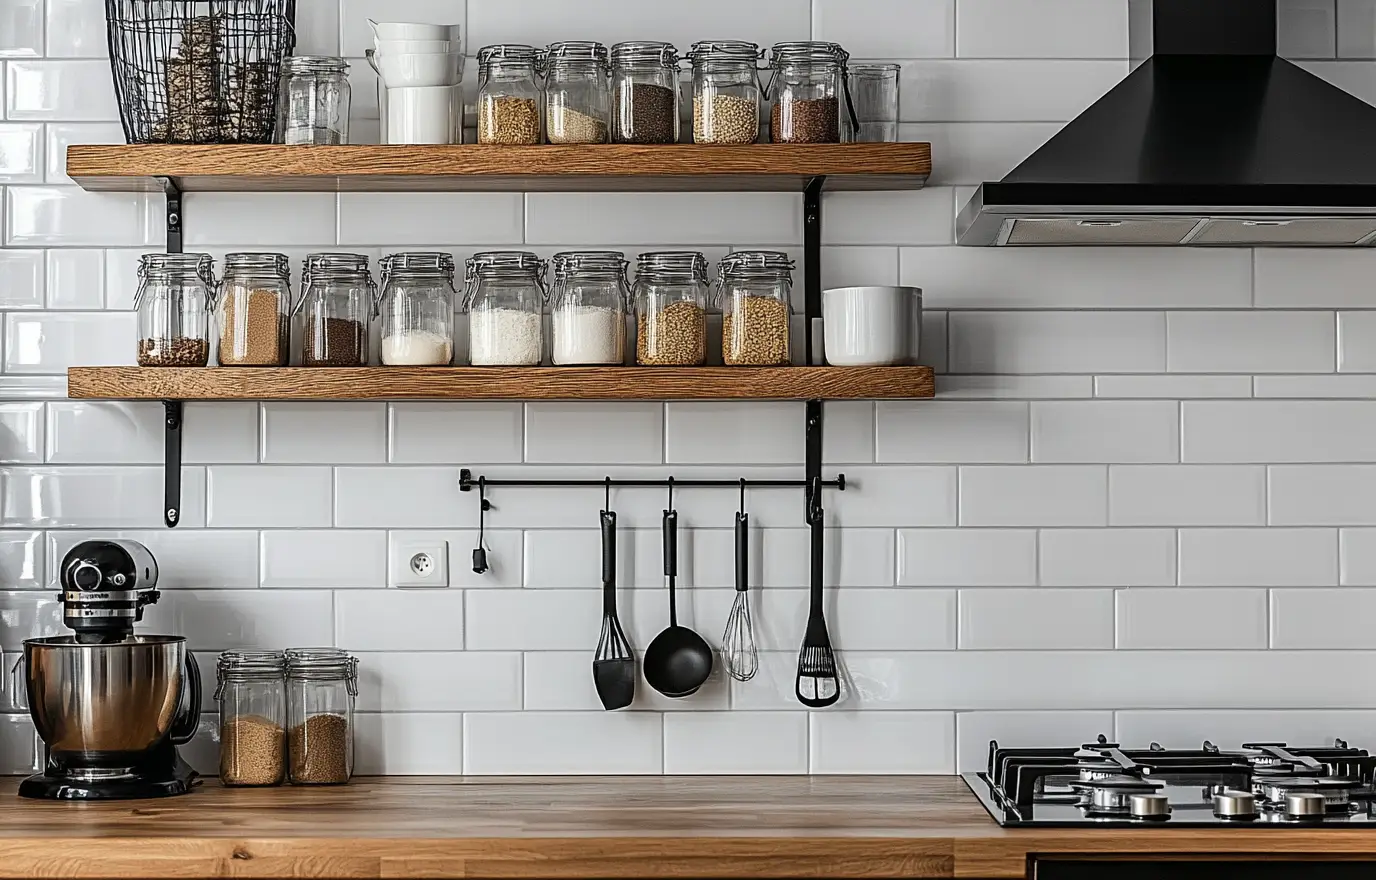
PHOTO: Yueke
Step 2: Space Categorization
Modern cabinets typically consist of a system of base cabinets, a middle countertop, and tall cabinets. The space layout is relatively fixed, and the storage ideas are also quite standardized:
Base Cabinets:
These are used for storing large and heavy items that are frequently used.
Middle Countertop Area:
This area is designated for light, frequently used items. The focus here is more on functionality and work efficiency rather than storage.
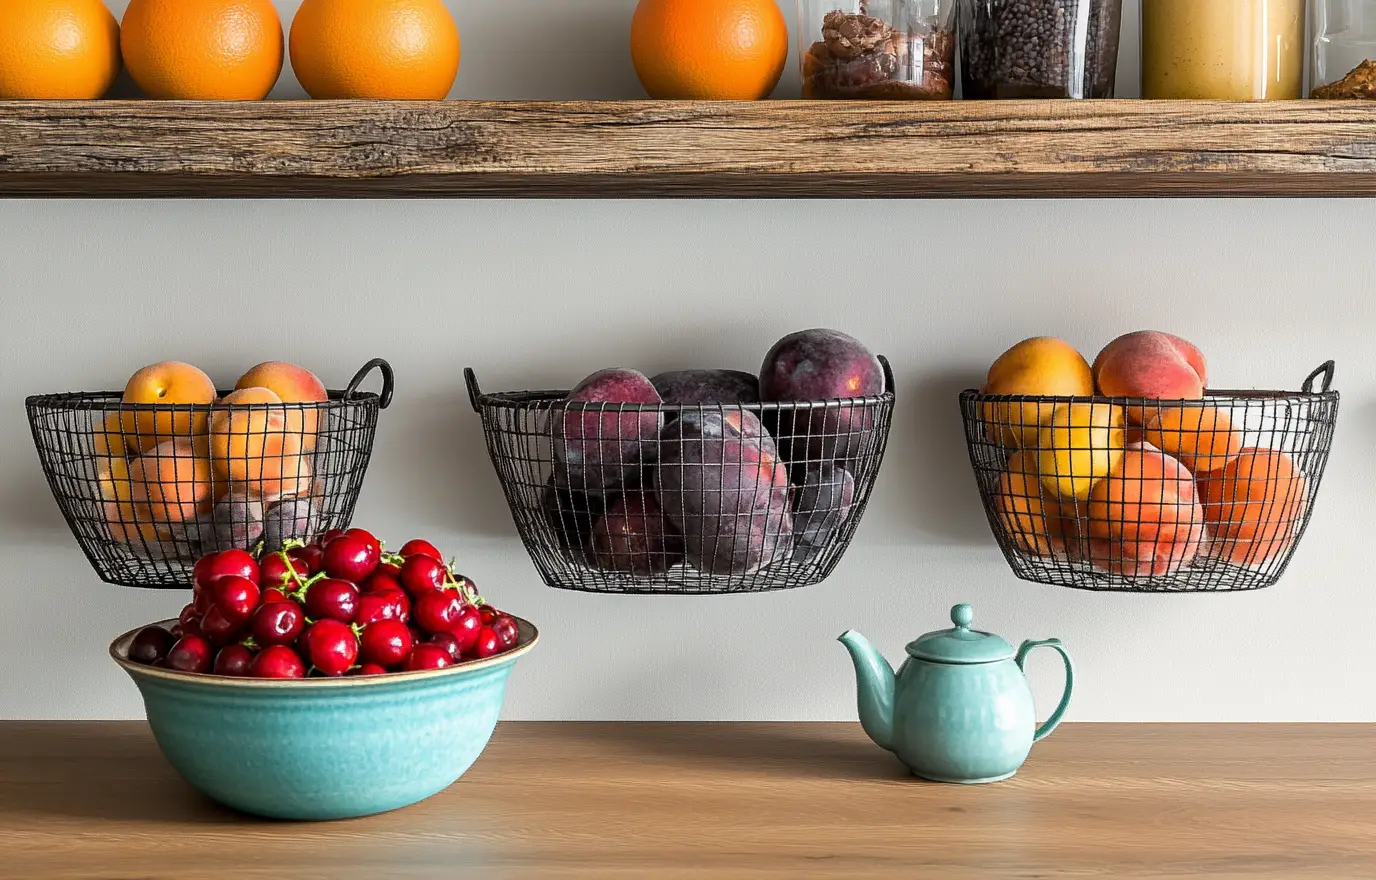
PHOTO: Yueke
Cutting Boards on the Wall:
Cutting boards are essential in the prep area. Although they are relatively small, they aren't suitable for storing in base cabinets. Hanging them directly on the wall is the most convenient option.
Knives, Temporary Lid Racks, Spatulas, and Seasonings on the Wall:
For those who are okay with placing items on the countertop or walls, it's recommended to hang spatulas and seasoning baskets directly on the wall. A long storage rod can handle this; as long as the items are lightweight, there's almost nothing that can't be hung up.
Dish Towels, Cup Brushes, and Other Cleaning Items:
It's also recommended to install a hanging rod or a drying rack on the wall above the sink or near the window. This setup helps keep items dry and separated, reducing the risk of bacteria growth by preventing damp conditions.
Fresh Ingredients on the Wall:
Some ingredients that don't need immediate refrigeration can be placed in hanging baskets on the wall. This not only keeps them accessible but can also add a touch of freshness and color to the kitchen decor.
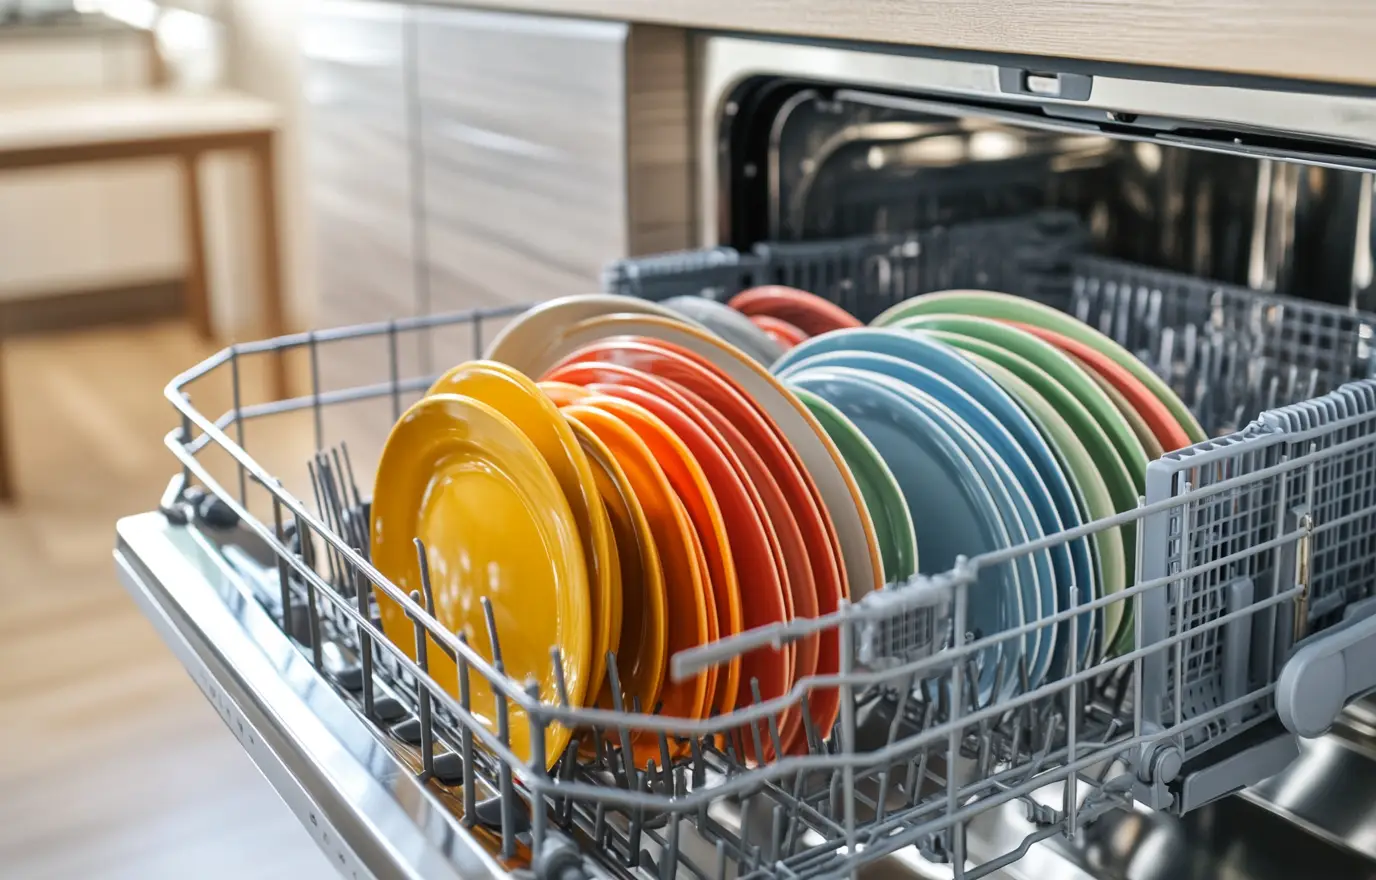
PHOTO: Yueke
Dishes and Utensils:
Most households now use dishwashers and sterilizing cabinets for storing dishes, and these large appliances are typically placed near the sink. This location is convenient for accessing plates during meal prep and cleaning up after meals. When it comes to storing dishes, it's generally more convenient to arrange them vertically rather than horizontally, making them easier to grab.
Various Baking Sheets and Trays:
For baking enthusiasts who collect various trays and pans, if they don’t fit in the sterilizing cabinet and stacking them is inconvenient, consider DIY-ing some shelves inside the wall cabinets. This allows for neat, organized storage and makes it easy to access your baking tools.
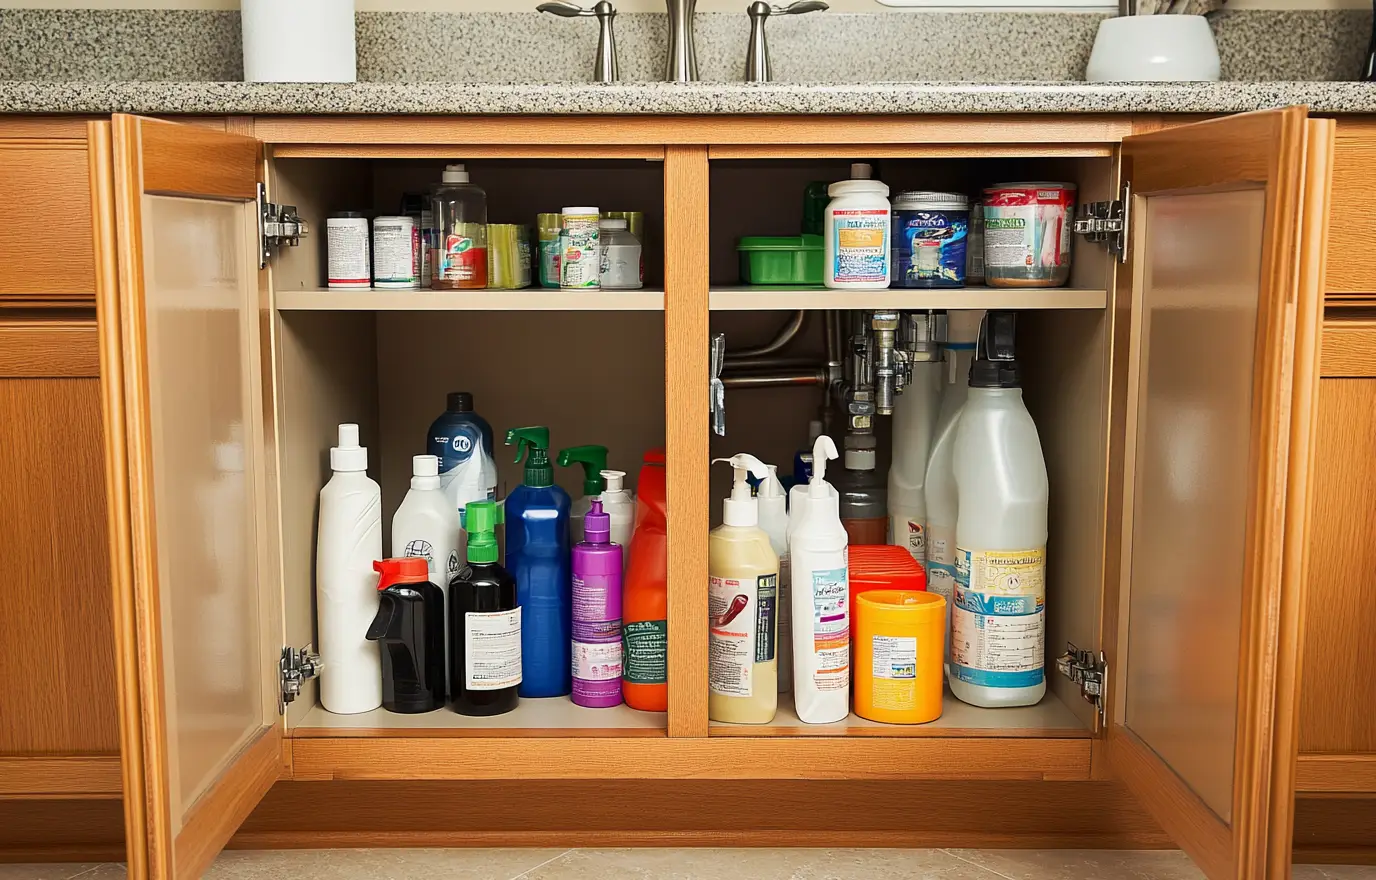
PHOTO: Yueke
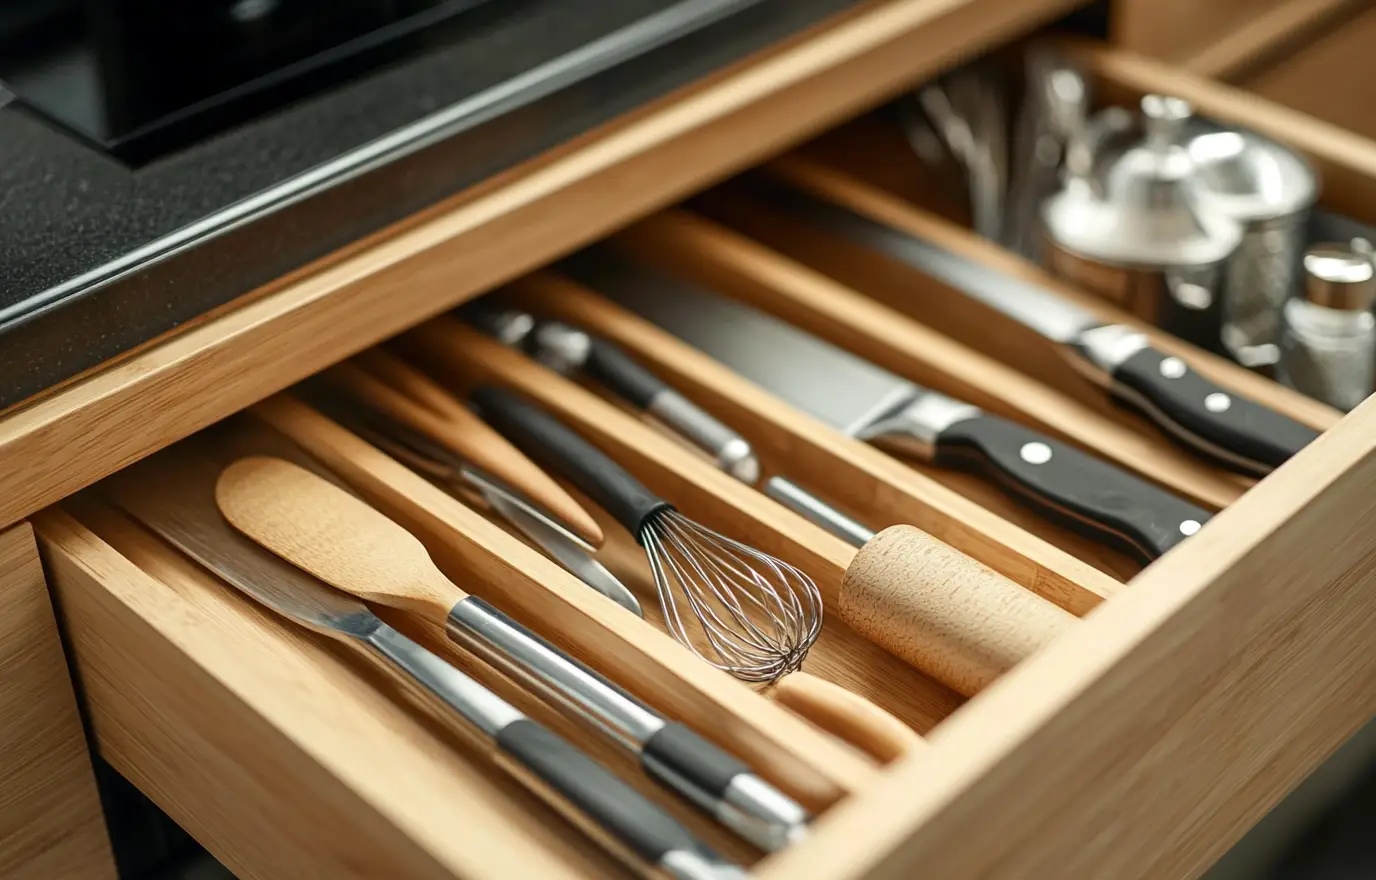
PHOTO: Yueke
Pots and Pans:
Similar to dishes, arranging pots and pans vertically is the most space-efficient and convenient method for storage. Small Appliances: Appliances like yogurt makers, blenders, bread makers, and soy milk machines, which don’t deal with grease, should be stored in cabinets away from the stove. If you have an island, placing them in the cabinet below the island is ideal.
Cleaning and Washing Supplies:
Items like towels and dish soap should naturally be stored in the cabinet under the sink. Hanging these items inside the cabinet door is a space-saving option. Small Items (Aluminum Foil, Scissors, Candles, etc.): Use shallow drawers with dividers (basket-type or tray-type) to categorize and store these small items. This keeps them organized and easily accessible.
PHOTO: Yueke