logo

head portrait Sign Out
icon_more
logo
head portrait

Pascal Siakam, Pacers agree on $189M, four-year contract that can be signed in July, AP source says

Copyright Source: Yueke Wed, Jun 26, 2024
Pascal Siakam, Pacers agree on $189M, four-year contract that can be signed in July, AP source says
Pascal Siakam intends to sign a four-year, $189.5 million contract to remain with the Indiana Pacers when the NBA’s offseason moratorium is lifted in early July, a person with knowledge of the talks between the sides told The Associated Press on Wednesday.
The person spoke to the AP on condition of anonymity because neither the player nor the club may announce the agreement by league rule. ESPN, citing unnamed sources, was first to report that Siakam decided to remain with the Pacers.
Free agency does not begin until June 30, but this agreement was not in violation of any league rules. Under the terms of the new collective bargaining agreement, teams could start speaking to their own free agents one day after the conclusion of the NBA Finals. The Pacers were clear going into the offseason that retaining Siakam was a top priority, so it was no surprise that they wanted to begin official talks quickly.
“The first very important step is to begin recruiting Pascal Siakam in earnest,” Pacers coach Rick Carlisle said a few weeks ago, shortly after the Pacers’ season ended. “That will start today with exit meetings. He’s a great player. He was tremendous for us.”
Siakam — a two-time All-Star and part of the Toronto team that won the 2019 NBA title — would be in line to make about $42 million next season and around $53 million in 2027-28, the final year of the new deal.
The Pacers acquired the 30-year-old power forward in a January trade, and he quickly became a major part of the team that reached the Eastern Conference finals before falling to eventual NBA champion Boston. Siakam shot 55% from the field and 38% from 3-point range in 41 regular-season games with Indiana this past season.
Counting his time in Toronto, Siakam averaged 21.7 points and 7.1 rebounds this past season. The Pacers will have him and guard Tyrese Haliburton — who is about to enter the start of a $245 million, five-year deal that was agreed upon last summer — as their franchise cornerstones going forward.
Carlisle said he still considered this past season to be Year 2 of a rebuild in Indiana, but he noted that the acquisitions of Siakam and Haliburton (who was traded to Indiana in February 2022) fast-tracked the plan.
“The fact that all these pieces fit well together put us in a strong position this year,” Carlisle said when the season ended.
___
AP NBA:

NEXT: Royce Lewis didn’t realize his latest homer for the Twins made a large section of videoboard go dark
MINNEAPOLIS (AP) — Royce Lewis noticed the large section of the ribbon board above left field that went blank in the middle of the game and figured the people in charge of ballpark operations for the Twins were frustrated by the malfunction on Wednesday night. As it turned out, Lewis — with his eighth home run in 14 games — was the culprit. “If I had to pay for that, that would be a lot,” he said sheepishly. “Hopefully not.” The Twins had a game to play, of course, a tight one that tilted toward the Tampa Bay Rays in the 10th inning on, coincidentally, a throwing error by Lewis that allowed the go-ahead run to score. They didn’t realize the correlation between the homer and the videoboard malfunction. “I had no idea it was from me, no,” said Lewis, who has the most home runs in Twins history in a player’s first 14 games of a season. “It’s funny, I feel it off the bat now, and I have a good idea that it’s probably gone. I’m just looking at my teammates to amp them up and get them going. I think they love it just as much as I do now, so just trying to get the boys going.” This one wasn’t quite Roy Hobbs busting the light bulbs in the movie “The Natural,” but the videoboard-breaker was yet another highlight to add to the reel for the ebullient first overall pick in the 2017 draft. Lewis, who went 3 for 4 with a walk and is batting .380 with a .439 on-base percentage and a .900 slugging percentage this season, has hit 29 homers with 74 RBIs in 90 career major league games including the playoffs. With an exit velocity measured at 108.7 mph off a 2-2 cutter from Rays right-hander Taj Bradley, this one ricocheted off the ribbon board that fronts the second deck above left field. Seconds later, a long section of LED lights used to depict the rotating advertisements went dark. The red Budweiser logos that were up at the time wound up with a blank black splotch, as did the rest of the ads that followed. “When he finds the barrel, you hear that kind of piercing snap,” manager Rocco Baldelli said. “He finds the barrel more often than most and when it leaves the bat, a lot of the time there’s not really a question. You feel pretty good about it as it’s leaving the bat. It was another good swing by him. He’s having a lot of very meaningful at-bats. He’s doing a lot of very, very positive things for us at the plate right now. We’ve seen that a lot from him already in the couple weeks he’s been playing, and I keep saying it: ‘More to come.’ There’s no reason why there shouldn’t be more to come.” Lewis stopped an 0-for-7 skid with a single in the first inning. “I don’t do that slump thing,” he said, recalling a conversation earlier in the day with teammate Pablo López. “That’s not a real thing for me.” ___ AP MLB: https://apnews.com/hub/mlb ```

icon_top Top Headlines

Two kings, one prince due to attend their national teams’ games on same day at Euro 2024

VLADIMIR PUTIN

Popular flowers and their meanings: How to send a message with a floral gift

VLADIMIR PUTIN

Should young kids have smartphones? These parents in Europe linked arms and said no

VLADIMIR PUTIN

Select more content

Select more content

Olympic track hopeful Eric Holt quits job, moves in with parents to focus on making Paris Games
Kings acquire goaltender Darcy Kuemper from Capitals for forward Pierre-Luc Dubois
5 Real-Life IKEA Closet Storage Ideas Used by Our Editors
Coming back from cancer, Brazil rugby sevens star Raquel Kochhann ready to tackle her third Olympics
Movie Review: ‘Kinds of Kindness,’ Emma Stone’s latest foray into fearlessness with Yorgos Lanthimos
[Recipes] Summer Dessert No-Bake Oreo Cheesecake
2-time French doubles champ Caroline Garcia leads France tennis team at Olympics
Rising Rates of PTSD and Anxiety Among College Students
Movie Review: ‘Kinds of Kindness,’ Emma Stone’s latest foray into fearlessness with Yorgos Lanthimos
[Recipes] Summer Dessert No-Bake Oreo Cheesecake
2-time French doubles champ Caroline Garcia leads France tennis team at Olympics

Recommend

8 Best Summer Superfruits

Oh honey, let’s talk summer and the best season for fresh produce, aka Superfruits heaven. While “Superfruits” might not be an official scientific category, nutritionists rave about these nutrient-packed delights. They do wonders like boosting your immune system, supporting gut health, and more. Plus, they’re versatile—think blueberries and tomatoes in everything from muffins to marinara. Ready to stock up? Let’s dive into the must-have summer Superfruits, according to our fave dietitians.

Chatty Kitchen

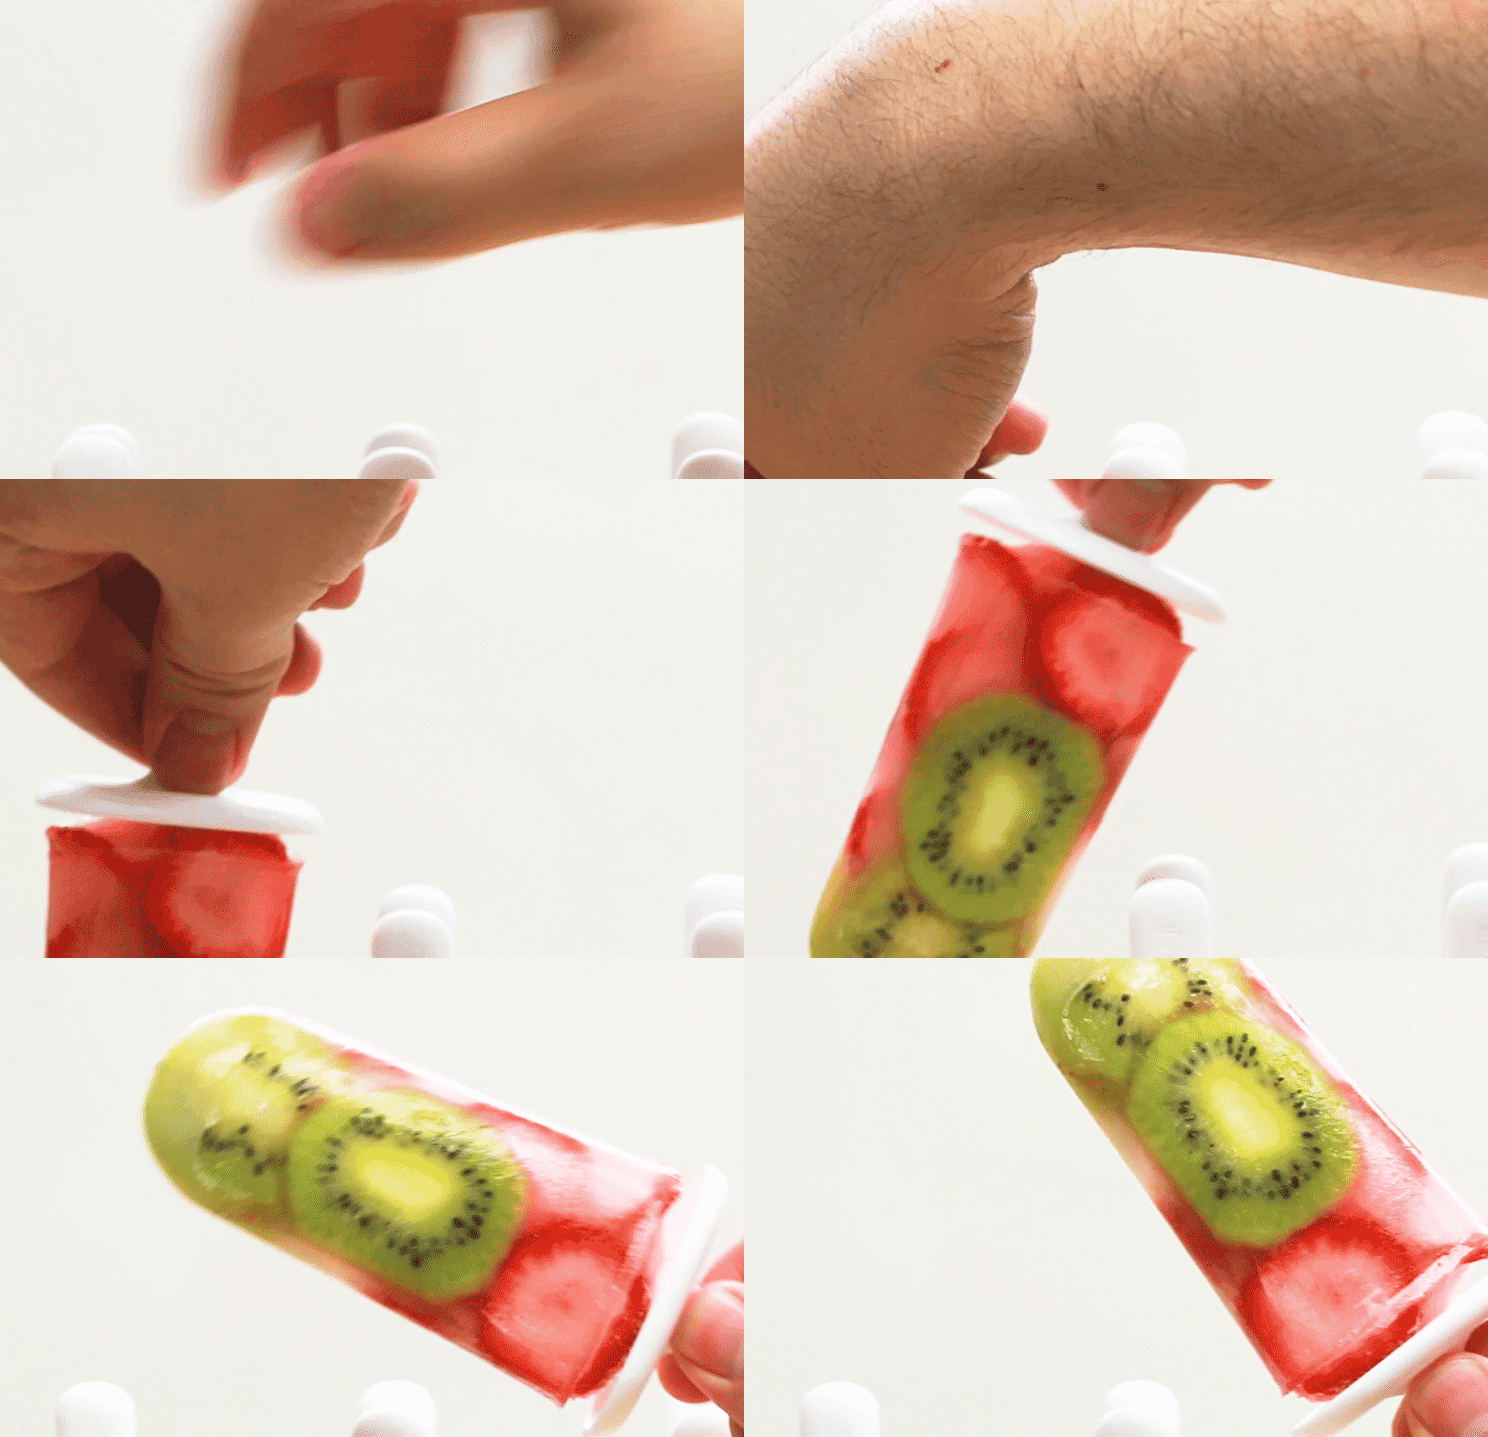
[Recipes]Guilt-free Popsicles Are The Perfect Match For Summer

<span style="font-weight: 500;font-size:20px">Ingredients</span> for 6 popsicles 1 cup strawberry 1 cup kiwi 1 ½ cups water <span style="font-weight: 500;font-size:20px">Special Equipment</span> popsicles mold, with 6 slots <span style="font-weight: 500;font-size:20px">Preparation</span> 1. Cut kiwis and strawberries into thin slices. Remove kiwi skin, and discard strawberry tops. 2. Fill the popsicles mold with the fruit. 3. Fill in the gaps of air with water. 4. Freeze the popsicles for at least 5 hours. 5. Take the frozen popsicles out of the ice molds and enjoy!

Chatty Kitchen

Clever Food Pantry Organization Ideas to Keep You Clutter-Free

Group Foods by Type Think of your pantry like a grocery store—keep similar items together. Designate areas for breakfast foods such as cereals and oats, canned goods, condiments, and packaged items like pasta or rice. Pearce Design Group places canned drinks and non-food items lower down.

Organization Tools

How to Fake a Spotless Home with 7 Lazy Hacks

Hey, my dear readers! Are you like me—lazy but still wanting a spotless-looking home, especially when friends visit on the weekends? I’ve compiled a few quick cleaning hacks for the lazy ones among us. You can also use these tips for daily maintenance because, let’s face it, even lazy folks like to have a tidy space. 1. Wipe Down Glass Surfaces Clean your coffee table, TV screen, and mirrors. Glass shows every speck of dust and fingerprints, so a quick wipe can make a big difference. 2. Hide Clutter in Baskets Use pretty woven baskets to temporarily stash away clutter. Place a blanket over the top to disguise the mess. Straighten up pillows and decor while you're at it. 3. Clean Kitchen Counters A clean kitchen is inviting. Sweep crumbs into a small brush pan set and vacuum the stove crevices. Spray multipurpose cleaner for a fresh scent. 4. Vacuum and Tidy Corners Quickly vacuum high-traffic areas and focus on corners where dust bunnies collect. Clean the baseboards too for a polished look. 5. Speed-Clean the Bathroom Swap out towels, wipe the mirror and faucet, and clean the sink and toilet. Hide countertop clutter in the medicine cabinet. 6. Take Out the Trash Empty trash cans to prevent odors. This small step makes a big difference in maintaining a clean vibe. 7. Open Curtains and Light a Candle Natural light makes spaces look cleaner. Light a candle for a welcoming scent. Close doors to rooms you don’t need to clean. With these tips, your home will look neat and tidy in no time, leaving you more time to enjoy with your guests.

How to Hide Scars With Makeup

They say that death and taxes are the only certainties in life, but I’d argue that scars deserve a spot on that list too. Whether it’s a mark from an old acne breakout, a curling iron mishap, or a childhood injury that never quite healed, scars are a universal experience. If your scars don’t bother you, that’s wonderful. However, for those with visible scars—especially on the face—makeup can be a game-changer. Covering scars with makeup requires a different approach than concealing dark circles or pimples. , “Covering up scars can be quite tricky since makeup is mostly a two-dimensional medium while scars are often three-dimensional.” Too much makeup can emphasize texture rather than hide it, so it’s all about thin layers and blending. The technique also varies based on the type of scar. Here’s a detailed, professional guide on how to use makeup to cover scars, plus the best products for the job. General Step-by-Step Guide to Covering Scars with Makeup 1. Moisturize Your Skin Hydrated skin is key to achieving a flawless makeup application. Start by applying a good moisturizer to ensure your skin is well-prepped. 2. Apply a Primer Primers help smooth out the skin’s surface and increase the staying power of your makeup. Choose a primer that matches your skin type for the best results. 3. Use Foundation Before Concealer Adivi recommends applying a thin layer of foundation over your entire face before using concealer. This evens out the skin tone and reduces the amount of concealer needed. 4. Set Your Makeup Lock everything in place with a setting powder or spray to enhance longevity and coverage. Techniques for Different Types of Scars Raised Scars (Hypertrophic) Raised scars are smooth and can have a shiny appearance. Celebrity makeup artist Andrew Sotomayor suggests using mattifying products to counteract the shine and provide better adhesion. A thin layer of foundation and concealer is usually sufficient for these scars. - Depressed Scars For pitted or atrophic scars, a filling primer can help create a smoother surface. Adivi recommends using a concealer slightly lighter than your skin tone to the deepest points, creating the illusion of raised skin. Use a small eyeliner brush for precise application. - Dark Spots Post-inflammatory hyperpigmentation requires a high-coverage concealer. Sotomayor advises using a long-wear concealer and setting it with translucent powder before and after application for extra coverage. - Red Marks To neutralize redness, Adivi and Sotomayor suggest using a green color corrector under your concealer and foundation. Alternatively, mix the corrector with your concealer for a seamless blend. Conclusion These professional tips and techniques can help you effectively camouflage scars with makeup, ensuring a smooth and flawless finish. Experiment with different products and methods to find what works best for your skin type and scar texture.

beauty tutorials

How to Find the Perfect Foundation for Dark Skin

Finding the best foundation for dark skin is no longer like searching for a unicorn. A broader range of foundations and makeup for women of color exist today than ever before - something for every shade of beautiful! Where’s the best place to start to find your own flawless foundation? Read on for our pro tips for choosing the perfect foundation for brown and black skin.

beauty tutorials

How to clean Your dog's ears: 3 simple steps

Before Cleaning, Ensure You Have the Appropriate Supplies. We Recommend Preparing the Following Items: - A dog-specific ear cleaner - Moist cotton balls or pads - A towel - Treats - An extra pair of hands (if your dog does not stay still)

How to Speed Up Your Kitchen: 8 Common Knife Mistakes to Avoid, According to Chefs

Alright, darlings, gather 'round because we need to talk about the travesty that is your kitchen knife etiquette. Knives are like the Louboutins of your kitchen—absolutely essential, and if you're not treating them right, you're wasting serious culinary potential. I got the inside scoop from some top chefs on the most horrendous knife mistakes you're making and how to fix them, so let’s dive in and get your kitchen game on point. <span style="font-weight: 500;font-size:20px">1. Don't Leave a Knife Wet</span> Seriously, if you’re leaving your knives to air dry, you might as well throw them in the trash. Dry your knife right away after washing. Don't let it sit. Leaving it wet can dull the blade or cause rust. And don’t even think about soaking them overnight. Quick wash and dry, people! <span style="font-weight: 500;font-size:20px">2. Keep Knives Out of the Dishwasher</span> Do I even need to say this? Dishwashers are the graveyard of sharp tools. Always handwash to make sure it's properly scrubbed with soapy water and dry it immediately. Dishwashers will ruin your knives faster than you can say “dull Airbnb knife.” <span style="font-weight: 500;font-size:20px">3. The Blade Isn’t a Scraper</span> Stop using the sharp side of your knife to scrape food off your cutting board! Use the backside to avoid dulling it. Or, better yet, use a bench scraper. Your knife is for cutting, not scraping, darling. <span style="font-weight: 500;font-size:20px">4. Picking the Wrong Knife</span> Most of you are either overestimating or underestimating your knife needs. The fancy Japanese knives are for pros who know how to take care of them. If you buy something super cheap, it’ll get dull after a few uses. Start with a good, affordable brand that’s durable. <span style="font-weight: 500;font-size:20px">5. Sharpen Your Knives</span> A dull knife is a dangerous knife. Sharpen them at least twice a year. Learn to use a whetstone or take them to a pro. Trust me, it’s worth it. <span style="font-weight: 500;font-size:20px">6. If You Can’t Commit to Sharpening, Pick Serrated</span> Serrated knives stay sharper longer and can be used for more than just bread. If you’re not going to sharpen your knives, stick with serrated ones. They’re low maintenance and versatile. <span style="font-weight: 500;font-size:20px">7. Store Your Knives Correctly</span> Stop slamming your knives onto magnetic holders! Let the spine of the knife touch the holder first and then gently let the edge connect. And please, no storing knives tip-down in utensil holders. Use a magnetic strip, cork-lined drawer, or knife cover. <span style="font-weight: 500;font-size:20px">8. Serrated Blades Are Best For Acidic Foods</span> Acidity can corrode the blade edge, causing faster deterioration. Use serrated knives for tomatoes, lemons, and citrus fruits to preserve your other blades. There you have it, folks. Stop making these knife faux pas and start treating your kitchen like the gourmet sanctuary it’s meant to be. Happy chopping!

Kitchen Picks

Hot

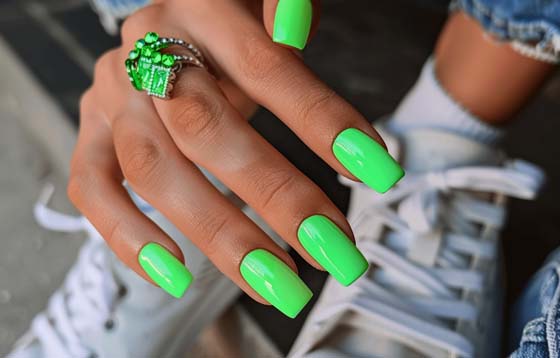
8 Must-Try Short Square Nail Designs for Summer: Vibrant and Chic Ideas

As summer makes its grand entrance, short square nails are emerging as the ultimate canvas for vibrant and stylish nail art. These trendy designs not only showcase your sense of fashion but also reflect your personality. Whether you're enjoying a refreshing drink by the beach or working in a trendy café, your nails will surely be a conversation starter. Let's explore the top designs that are making a splash this season.

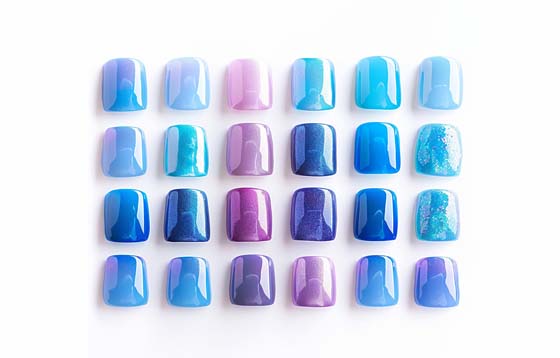
8 Short Blue Nail Idea To Try In 2024

blue is the perfect hue to embody both creativity and elegance. Whether you prefer a soft, serene look or a bold, vibrant statement, blue nail designs offer endless possibilities. Here are some of the most popular blue shades for 2024: Dark Indigo Blue: This deep, rich shade is perfect for a sophisticated and timeless look. It's a favorite for those who love a classic yet edgy vibe. Classic Navy Blue: Always in style, navy blue is versatile and chic, ideal for both formal and casual occasions. Royal Blue: This vibrant, regal shade stands out beautifully, making it perfect for those who want their nails to be the center of attention. Bright Neon Blue: For a fun and energetic vibe, neon blue nails are a must. They’re eye-catching and perfect for summer days or nights out. Light Blueberry Milk: This soft, pastel blue is perfect for a subtle, elegant look. It’s trendy and adds a touch of sweetness to any outfit. Choose your shade based on your mood and personal style to make the best impression.

8 Enchanting Bridal Nail Ideas for Summer

As summer weddings approach, brides are looking for the perfect nail designs to complement their bridal looks. This season, the trends are all about combining elegance with a touch of enchantment. From classic French tips with a modern twist to intricate floral designs and sparkling accents, these eight enchanting bridal nail ideas are sure to make any bride feel magical on her special day. Whether you prefer subtle sophistication or dazzling details, these nail designs offer a variety of styles to suit every bride's taste and wedding theme. Let's explore these captivating options that will add the perfect finishing touch to your bridal ensemble.

How to Hide Scars With Makeup

They say that death and taxes are the only certainties in life, but I’d argue that scars deserve a spot on that list too. Whether it’s a mark from an old acne breakout, a curling iron mishap, or a childhood injury that never quite healed, scars are a universal experience. If your scars don’t bother you, that’s wonderful. However, for those with visible scars—especially on the face—makeup can be a game-changer. Covering scars with makeup requires a different approach than concealing dark circles or pimples. , “Covering up scars can be quite tricky since makeup is mostly a two-dimensional medium while scars are often three-dimensional.” Too much makeup can emphasize texture rather than hide it, so it’s all about thin layers and blending. The technique also varies based on the type of scar. Here’s a detailed, professional guide on how to use makeup to cover scars, plus the best products for the job. General Step-by-Step Guide to Covering Scars with Makeup 1. Moisturize Your Skin Hydrated skin is key to achieving a flawless makeup application. Start by applying a good moisturizer to ensure your skin is well-prepped. 2. Apply a Primer Primers help smooth out the skin’s surface and increase the staying power of your makeup. Choose a primer that matches your skin type for the best results. 3. Use Foundation Before Concealer Adivi recommends applying a thin layer of foundation over your entire face before using concealer. This evens out the skin tone and reduces the amount of concealer needed. 4. Set Your Makeup Lock everything in place with a setting powder or spray to enhance longevity and coverage. Techniques for Different Types of Scars Raised Scars (Hypertrophic) Raised scars are smooth and can have a shiny appearance. Celebrity makeup artist Andrew Sotomayor suggests using mattifying products to counteract the shine and provide better adhesion. A thin layer of foundation and concealer is usually sufficient for these scars. - Depressed Scars For pitted or atrophic scars, a filling primer can help create a smoother surface. Adivi recommends using a concealer slightly lighter than your skin tone to the deepest points, creating the illusion of raised skin. Use a small eyeliner brush for precise application. - Dark Spots Post-inflammatory hyperpigmentation requires a high-coverage concealer. Sotomayor advises using a long-wear concealer and setting it with translucent powder before and after application for extra coverage. - Red Marks To neutralize redness, Adivi and Sotomayor suggest using a green color corrector under your concealer and foundation. Alternatively, mix the corrector with your concealer for a seamless blend. Conclusion These professional tips and techniques can help you effectively camouflage scars with makeup, ensuring a smooth and flawless finish. Experiment with different products and methods to find what works best for your skin type and scar texture.

beauty tutorials

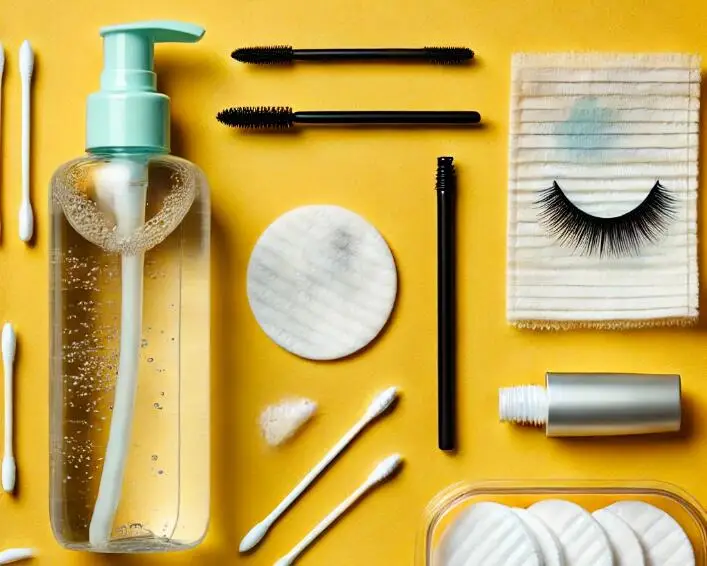
How to Remove Makeup Without Makeup Remover: 8 Effective Methods

As a travel enthusiast, forgetting to pack makeup remover is all too common. Washing my face repeatedly with hotel soap is a nightmare I never want to relive. To avoid this, I consulted some makeup artist and model friends to compile a list of effective makeup removal methods for those times when you’re without your usual remover. Whether you're forgetful or a DIY enthusiast, I hope these tips help! 1. Olive Oil Think of olive oil as your versatile beauty savior. Marie Watkinson, founder of NYC’s Spa Chicks On The Go, swears by it. Just wet a cotton pad with water, add some olive oil, and swipe away your eye makeup. It’s gentle and won’t cause breakouts, plus it leaves your skin feeling soft and conditioned. 2. Coconut Oil Rachel Lozina from Blue Water Spa recommends coconut oil for its excellent dirt and makeup dissolving properties. It’s especially great for dry skin, but remember to rinse thoroughly if you have oily or acne-prone skin. 3. Jojoba Oil Jojoba oil is another fantastic option. According to Alexis Pfropper of asthetik skincare, it closely mimics the skin’s natural oils, making it suitable for all skin types, including oily and acne-prone skin. It effectively removes makeup without clogging pores. 4. Oil with a Pinch of Baking Soda For stubborn, silicone-based makeup, mix any oil (like jojoba, coconut, or olive) with a small pinch of baking soda. Elina Fedotova of Elina Organics advises against using this mix around the eyes, but it works wonders on the rest of your face. Cleanse and rinse thoroughly afterward. 5. Micellar Water If you have micellar water on hand, you’re in luck. This blend of oil and soft water is a powerful, effective makeup remover. It picks up residual makeup, oil, and dirt effortlessly, says Lozina. 6. Aloe Vera For a gentle and soothing option, turn to aloe vera. Ideal for sensitive skin, it’s great for removing light, non-waterproof makeup. Simply massage aloe vera gel onto your face with a cotton pad or your fingers, then rinse with water, advises Pfropper. 7. Witch Hazel Witch hazel is a fantastic astringent for those with oily skin. Lozina recommends following up with a hydrating serum and moisturizer if you have normal or dry skin. 8. Oat Flour, Water, and Honey For a gentle exfoliating scrub, mix oat flour with water and honey. Fedotova suggests applying this mixture as a mask for up to 10 minutes. As you rinse, massage your skin to let the oat particles exfoliate while honey soothes and decongests pores. Conclusion These DIY makeup removers are not only effective but also kind to your skin. Whether you prefer oils, natural ingredients, or a simple scrub, you’ll find a method that works for you. Embrace the simplicity and effectiveness of these homemade solutions and enjoy a fresh, clean face with ease. For more beauty tips and DIY recipes, check out resources like Byrdie and Allure.

beauty tutorials

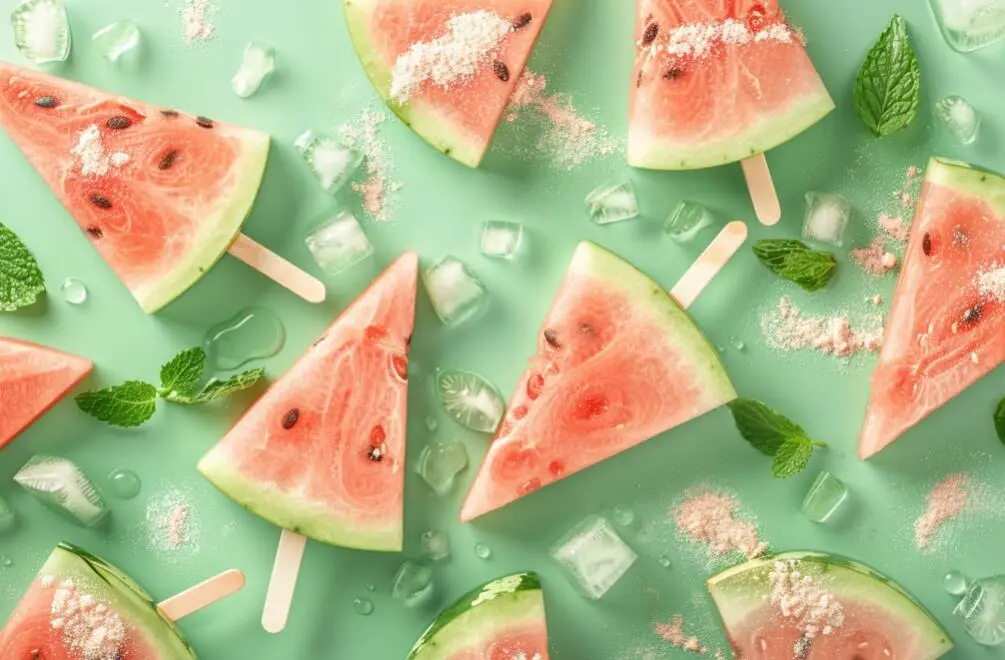
How to Freeze Watermelon? A Step-by-Step Guide!

Honey, let’s get real for a second. Picking the perfect watermelon? It’s practically an art form. Some people just don’t have the touch, but that doesn’t mean you can’t enjoy a juicy, ripe watermelon that screams summer. If you’re hosting a barbecue or a pool party, this hydrating fruit isn’t just a snack—it’s the star of the show. But what happens when you have leftovers? Don’t even think about tossing them out. Freezing watermelon is your best bet to keep that summery goodness going all year long. So, let’s dive into how you can freeze watermelon like a pro. - Can You Freeze Watermelon? Oh honey, absolutely. If you find yourself with more watermelon than you know what to do with, freezing it is the way to go. Watermelon season is fleeting, so stash those juicy pieces in the freezer and savor them long after the sun sets on summer. - How to Freeze Watermelon Darling, freezing watermelon couldn’t be simpler. If you’ve got space in your freezer, grab a couple of baking sheets to make the process faster. Here’s the lowdown: 1. Prep Your Baking Sheet: Line it with parchment or wax paper. 2. Cut the Watermelon: Ditch the rind and seeds, then cut your watermelon into cubes or wedges. 3. Freeze: Spread the pieces on the sheet, making sure they’re not touching. Freeze until solid. 4. Store: Transfer the frozen pieces to a freezer bag or airtight container. Don’t forget to label with the date. 5. Enjoy: Use within 9 months to a year for the best quality. - How to Thaw Frozen Watermelon Ready to dive back into that frozen stash? Here’s how to do it right: 1. Fridge Time: Move the watermelon from the freezer to the fridge. 2.Timing: Let it thaw completely for up to 24 hours. If you’re making smoothies or desserts, you might prefer it slightly frozecheck every few hours until it’s perfect. - How to Use Frozen Watermelon Sweetie, frozen watermelon isn’t just for snacking. Get creative: 1. Smoothies and Cocktails: Think watermelon mojito granitas or boozy slushies. 2. Savory Dishes: Perfect for salad dressings and grain bowls. 3. Remember, thawed watermelon won’t have that crisp bite, so stick to using it in blended or liquid forms for the best results. - How Long Does Watermelon Last? Fresh watermelon lasts about 4-5 days once cut. But freeze it, and you’re looking at up to a year of deliciousness. So, darling, next time you’ve got leftover watermelon, you know exactly what to do. Enjoy that sweet taste of summer whenever you want!

Chatty Kitchen