logo

head portrait Sign Out
icon_more
logo
head portrait

Before toothpaste, what was used to clean teeth? Powdered ashes and other historical dental hygiene methods

Copyright Source: Yueke Fri, Jul 12, 2024
Before toothpaste, what was used to clean teeth? Powdered ashes and other historical dental hygiene methods

Before the modern luxury of toothpaste could be squeezed from convenient plastic tubes, our ancestors used various unique methods to clean their teeth.

Historical societies valued clean teeth, although not as much, perhaps, as we do today. Contemporary amenities afford us far greater opportunities for oral care.

So how did people in the past attend to their dental needs with the best possible resources available?

While some of the substances historically used for teeth cleaning bear little resemblance to our current products, others have notable similarities.


Toothpaste from ancient history

From as early as 500 BC, societies have experimented with various materials to concoct paste-like substances for teeth cleaning, predating the invention of toothbrushes.

The ancient Egyptians around the 4th century AD are the first documented people to devise a dental cream recipe.

A papyrus document was recovered that captured an account of a recipe for a "powder for white and perfect teeth."

The original concoction included a mixture of salt, pepper, mint, and dried iris flowers, according to National Geographic. While the abrasiveness of these ancient dental formulas was rough enough to commonly result in bleeding of the gums, modern toothpaste often contains hydrated silica with a similar purpose.


Heinz Neuman, an archaeologist, recounted his experience with the Egyptian paste at a convention. He reported that it initially caused his gums to bleed but was superior to toothpaste recipes from the 19th century. He said, "This recipe would have been a big improvement on some of the soap toothpaste used much later."

Neuman affirms that the ancient Egyptians used this paste for dental hygiene well before the existence of toothbrushes.

Other recipes called for peculiar items such as burned ashes of an ox hoof or crushed eggshells. One recipe contained, "powdered ashes from oxen hooves, myrrh, eggshells, and pumice," according to Frank Lippert of the Indiana University School of Dentistry.

Egyptians, however, were not alone in their use of bizarre ingredients. Greek and Roman concoctions often included crushed bones and oyster shells, with charcoal added for flavor.


Medieval toothpaste recipes

During the medieval period, from the 12th century to the 14th century, nonabrasive methods were primarily used for dental treatments and hygiene. This included herbal remedies and charms, the British Dental Journal says.

One recipe recorded from this period called for honey, salt, and rye flour or rye meal, according to National Geographic.

A compendium of three texts on women’s health was found from the 12th century called "Trotula." The texts are written in Latin and attributed to Trota of Salerno, a female physician at the time at the medical school in Salerno, Italy.

The Trotula provides several remedies for common teeth ailments of the time. The texts offer suggestions for:


Toothpaste during the 1800s and 1900s

Around the 1800s, dental hygiene started to become a higher priority. What was used to care for teeth during this era looked more like what we use today, and the recipes didn't cause gums to bleed as in previous eras.

One significant difference from our modern versions is that the recipes used soap.

Around the 1900s, fluoride was found to be a useful teeth-cleaning substance and was added to most toothpastes. Today, fluoride is required to have the ADA Seal of Acceptance, according to the American Dental Association.


Modern-day toothpaste

Prior to 1873, when Colgate introduced the first mass-manufactured toothpaste, these unique recipes served as the primary means for dental care. After Colgate entered the market, many variations have been formulated.

Today, the abundant toothpaste choices available in drugstores can be overwhelming, often leading to confusion.

Despite the availability of commercial toothpaste, many households remained faithful to their traditional concoctions. For instance, the 1860 guidebook "The Practical Housewife" continued to be popular.

It featured a popular toothpaste recipe that consisted of orris root, charcoal, Peruvian bark, prepared chalk, and essential oils of either bergamot or lavender.
NEXT: Doctor shares little-known trick for relieving stubborn hiccups in seconds - 'it actually works'
There’s nothing more disruptive than unexpected hiccups during a work meeting or when you’re trying to sleep. Fortunately, one doctor has revealed a simple trick to eliminate them in seconds. According to the Cleveland Clinic, hiccups occur due to involuntary contractions of the diaphragm, accompanied by the characteristic 'hic' sound from the vocal cords closing. The diaphragm, located under the ribcage, is crucial for breathing. While the exact cause of hiccups remains unclear, experts suggest that low levels of carbon dioxide in the blood and irritated nerves may contribute. Other factors such as eating and drinking too quickly, consuming carbonated beverages or alcohol, and stress can also trigger mild hiccups. People often try drinking water quickly or swallowing granulated sugar to alleviate hiccups, but acupuncturist Dr. Eileen Li recommends using pressure points for more effective relief. Under the username @, Dr. Li explained: "Hiccups happen when your diaphragm involuntarily contracts and spasms. This force travels up to your throat, causing the 'hic' noise. To help the diaphragm relax, there are specific points you can press to move the air force back to the diaphragm, resetting and relaxing it."

icon_top Top Headlines

Is 'color analysis' real? I put the viral TikTok phenomenon to the test − and was shocked.

VLADIMIR PUTIN

Embrace the 1940s: Beauty and Hair Inspiration for D-Day’s 80th Anniversary

VLADIMIR PUTIN

'Cruel trolls tell me to cover up - but I'll never stop flaunting my amazing mum curves'

VLADIMIR PUTIN

Select more content

Select more content

Top Summer Hair Accessories 2024: Hair Bow, Hair Cuffs and Floral Headbands
Full English breakfast swaps you should make right now, according to nutritionist
[Recipes] Citrus Rice Cooker Cake
Newly named Washington Post editor decides not to take job after backlash, will stay in Britain
Top Tips for Choosing and Wearing Colored Contact Lenses in 2024
Full English breakfast swaps you should make right now, according to nutritionist
[Recipes] Citrus Rice Cooker Cake

Recommend

8 Best Summer Superfruits

Oh honey, let’s talk summer and the best season for fresh produce, aka Superfruits heaven. While “Superfruits” might not be an official scientific category, nutritionists rave about these nutrient-packed delights. They do wonders like boosting your immune system, supporting gut health, and more. Plus, they’re versatile—think blueberries and tomatoes in everything from muffins to marinara. Ready to stock up? Let’s dive into the must-have summer Superfruits, according to our fave dietitians.

Chatty Kitchen

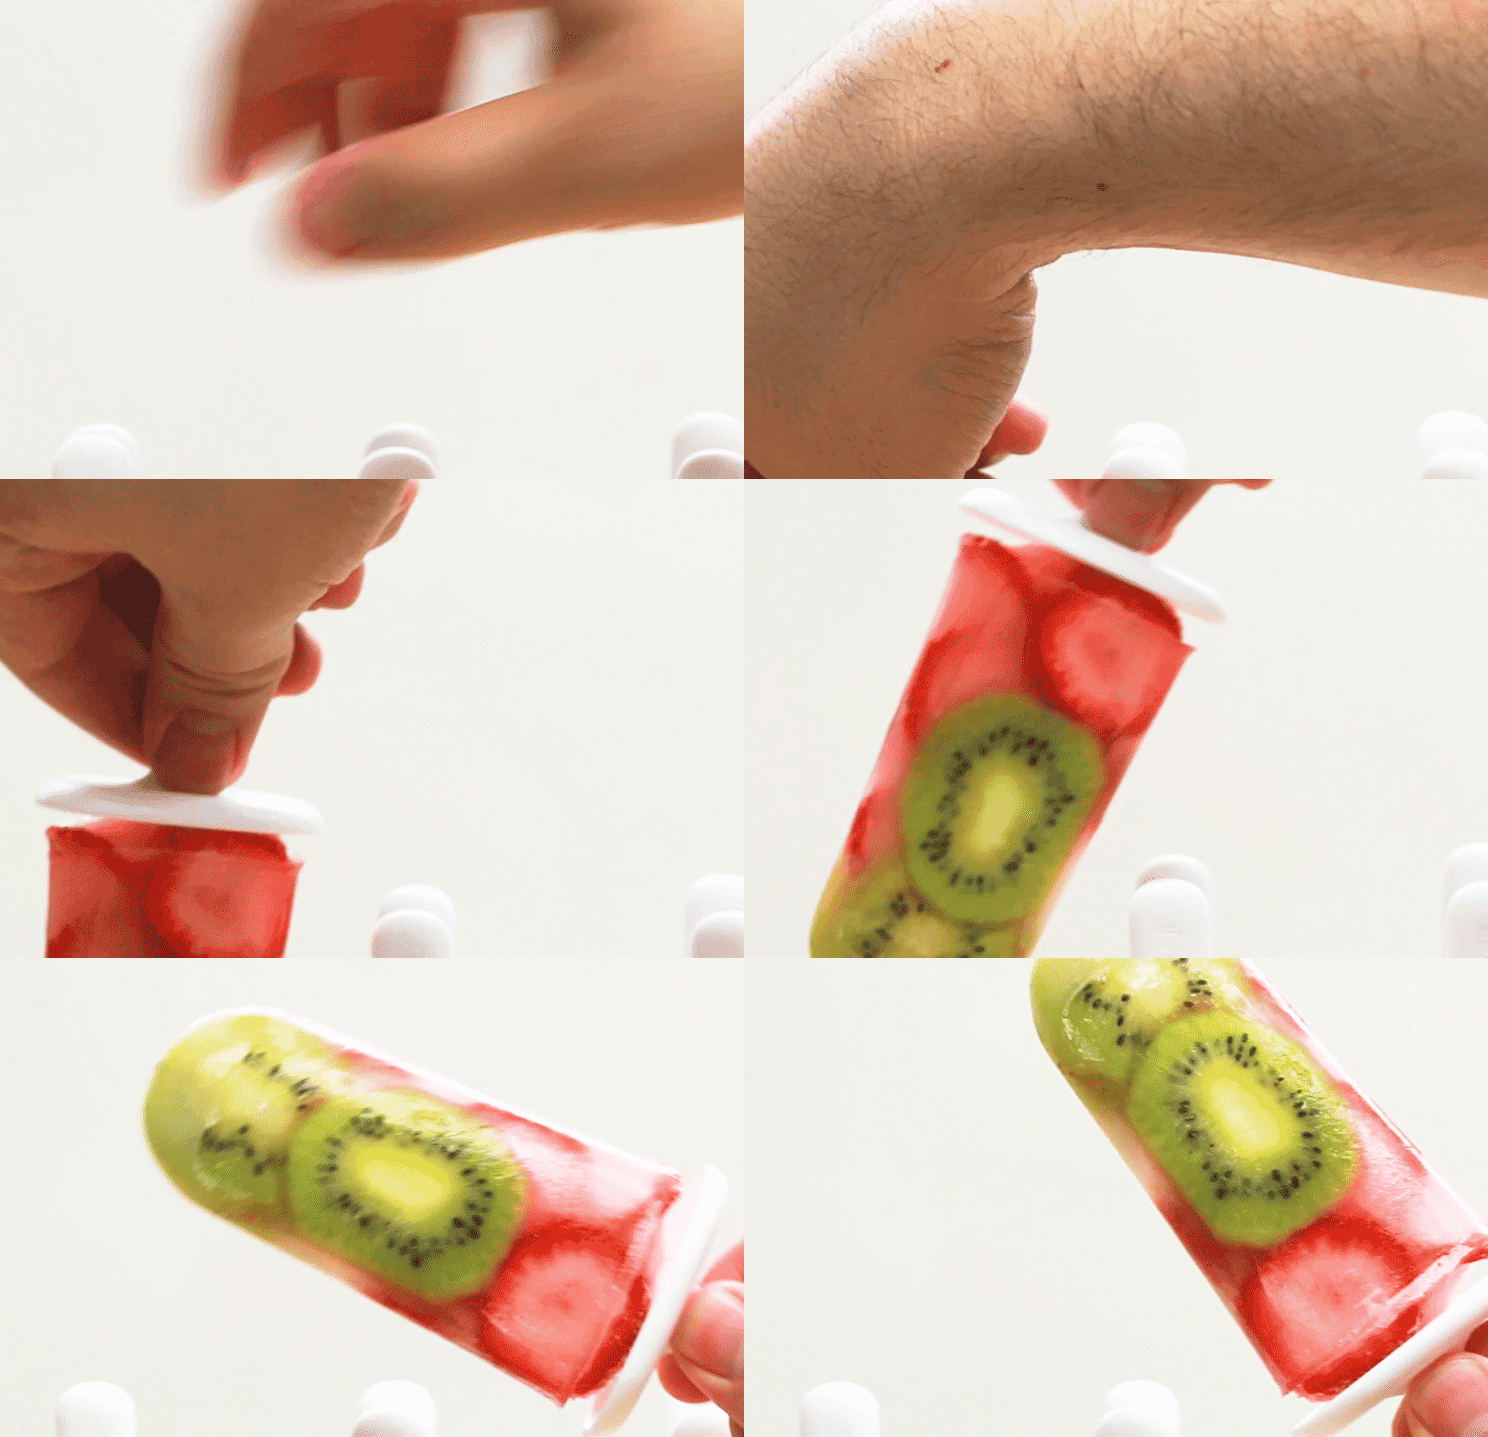
[Recipes]Guilt-free Popsicles Are The Perfect Match For Summer

<span style="font-weight: 500;font-size:20px">Ingredients</span> for 6 popsicles 1 cup strawberry 1 cup kiwi 1 ½ cups water <span style="font-weight: 500;font-size:20px">Special Equipment</span> popsicles mold, with 6 slots <span style="font-weight: 500;font-size:20px">Preparation</span> 1. Cut kiwis and strawberries into thin slices. Remove kiwi skin, and discard strawberry tops. 2. Fill the popsicles mold with the fruit. 3. Fill in the gaps of air with water. 4. Freeze the popsicles for at least 5 hours. 5. Take the frozen popsicles out of the ice molds and enjoy!

Chatty Kitchen

Clever Food Pantry Organization Ideas to Keep You Clutter-Free

Group Foods by Type Think of your pantry like a grocery store—keep similar items together. Designate areas for breakfast foods such as cereals and oats, canned goods, condiments, and packaged items like pasta or rice. Pearce Design Group places canned drinks and non-food items lower down.

Organization Tools

How to Fake a Spotless Home with 7 Lazy Hacks

Hey, my dear readers! Are you like me—lazy but still wanting a spotless-looking home, especially when friends visit on the weekends? I’ve compiled a few quick cleaning hacks for the lazy ones among us. You can also use these tips for daily maintenance because, let’s face it, even lazy folks like to have a tidy space. 1. Wipe Down Glass Surfaces Clean your coffee table, TV screen, and mirrors. Glass shows every speck of dust and fingerprints, so a quick wipe can make a big difference. 2. Hide Clutter in Baskets Use pretty woven baskets to temporarily stash away clutter. Place a blanket over the top to disguise the mess. Straighten up pillows and decor while you're at it. 3. Clean Kitchen Counters A clean kitchen is inviting. Sweep crumbs into a small brush pan set and vacuum the stove crevices. Spray multipurpose cleaner for a fresh scent. 4. Vacuum and Tidy Corners Quickly vacuum high-traffic areas and focus on corners where dust bunnies collect. Clean the baseboards too for a polished look. 5. Speed-Clean the Bathroom Swap out towels, wipe the mirror and faucet, and clean the sink and toilet. Hide countertop clutter in the medicine cabinet. 6. Take Out the Trash Empty trash cans to prevent odors. This small step makes a big difference in maintaining a clean vibe. 7. Open Curtains and Light a Candle Natural light makes spaces look cleaner. Light a candle for a welcoming scent. Close doors to rooms you don’t need to clean. With these tips, your home will look neat and tidy in no time, leaving you more time to enjoy with your guests.

How to Hide Scars With Makeup

They say that death and taxes are the only certainties in life, but I’d argue that scars deserve a spot on that list too. Whether it’s a mark from an old acne breakout, a curling iron mishap, or a childhood injury that never quite healed, scars are a universal experience. If your scars don’t bother you, that’s wonderful. However, for those with visible scars—especially on the face—makeup can be a game-changer. Covering scars with makeup requires a different approach than concealing dark circles or pimples. , “Covering up scars can be quite tricky since makeup is mostly a two-dimensional medium while scars are often three-dimensional.” Too much makeup can emphasize texture rather than hide it, so it’s all about thin layers and blending. The technique also varies based on the type of scar. Here’s a detailed, professional guide on how to use makeup to cover scars, plus the best products for the job. General Step-by-Step Guide to Covering Scars with Makeup 1. Moisturize Your Skin Hydrated skin is key to achieving a flawless makeup application. Start by applying a good moisturizer to ensure your skin is well-prepped. 2. Apply a Primer Primers help smooth out the skin’s surface and increase the staying power of your makeup. Choose a primer that matches your skin type for the best results. 3. Use Foundation Before Concealer Adivi recommends applying a thin layer of foundation over your entire face before using concealer. This evens out the skin tone and reduces the amount of concealer needed. 4. Set Your Makeup Lock everything in place with a setting powder or spray to enhance longevity and coverage. Techniques for Different Types of Scars Raised Scars (Hypertrophic) Raised scars are smooth and can have a shiny appearance. Celebrity makeup artist Andrew Sotomayor suggests using mattifying products to counteract the shine and provide better adhesion. A thin layer of foundation and concealer is usually sufficient for these scars. - Depressed Scars For pitted or atrophic scars, a filling primer can help create a smoother surface. Adivi recommends using a concealer slightly lighter than your skin tone to the deepest points, creating the illusion of raised skin. Use a small eyeliner brush for precise application. - Dark Spots Post-inflammatory hyperpigmentation requires a high-coverage concealer. Sotomayor advises using a long-wear concealer and setting it with translucent powder before and after application for extra coverage. - Red Marks To neutralize redness, Adivi and Sotomayor suggest using a green color corrector under your concealer and foundation. Alternatively, mix the corrector with your concealer for a seamless blend. Conclusion These professional tips and techniques can help you effectively camouflage scars with makeup, ensuring a smooth and flawless finish. Experiment with different products and methods to find what works best for your skin type and scar texture.

beauty tutorials

How to Find the Perfect Foundation for Dark Skin

Finding the best foundation for dark skin is no longer like searching for a unicorn. A broader range of foundations and makeup for women of color exist today than ever before - something for every shade of beautiful! Where’s the best place to start to find your own flawless foundation? Read on for our pro tips for choosing the perfect foundation for brown and black skin.

beauty tutorials

How to clean Your dog's ears: 3 simple steps

Before Cleaning, Ensure You Have the Appropriate Supplies. We Recommend Preparing the Following Items: - A dog-specific ear cleaner - Moist cotton balls or pads - A towel - Treats - An extra pair of hands (if your dog does not stay still)

How to Speed Up Your Kitchen: 8 Common Knife Mistakes to Avoid, According to Chefs

Alright, darlings, gather 'round because we need to talk about the travesty that is your kitchen knife etiquette. Knives are like the Louboutins of your kitchen—absolutely essential, and if you're not treating them right, you're wasting serious culinary potential. I got the inside scoop from some top chefs on the most horrendous knife mistakes you're making and how to fix them, so let’s dive in and get your kitchen game on point. <span style="font-weight: 500;font-size:20px">1. Don't Leave a Knife Wet</span> Seriously, if you’re leaving your knives to air dry, you might as well throw them in the trash. Dry your knife right away after washing. Don't let it sit. Leaving it wet can dull the blade or cause rust. And don’t even think about soaking them overnight. Quick wash and dry, people! <span style="font-weight: 500;font-size:20px">2. Keep Knives Out of the Dishwasher</span> Do I even need to say this? Dishwashers are the graveyard of sharp tools. Always handwash to make sure it's properly scrubbed with soapy water and dry it immediately. Dishwashers will ruin your knives faster than you can say “dull Airbnb knife.” <span style="font-weight: 500;font-size:20px">3. The Blade Isn’t a Scraper</span> Stop using the sharp side of your knife to scrape food off your cutting board! Use the backside to avoid dulling it. Or, better yet, use a bench scraper. Your knife is for cutting, not scraping, darling. <span style="font-weight: 500;font-size:20px">4. Picking the Wrong Knife</span> Most of you are either overestimating or underestimating your knife needs. The fancy Japanese knives are for pros who know how to take care of them. If you buy something super cheap, it’ll get dull after a few uses. Start with a good, affordable brand that’s durable. <span style="font-weight: 500;font-size:20px">5. Sharpen Your Knives</span> A dull knife is a dangerous knife. Sharpen them at least twice a year. Learn to use a whetstone or take them to a pro. Trust me, it’s worth it. <span style="font-weight: 500;font-size:20px">6. If You Can’t Commit to Sharpening, Pick Serrated</span> Serrated knives stay sharper longer and can be used for more than just bread. If you’re not going to sharpen your knives, stick with serrated ones. They’re low maintenance and versatile. <span style="font-weight: 500;font-size:20px">7. Store Your Knives Correctly</span> Stop slamming your knives onto magnetic holders! Let the spine of the knife touch the holder first and then gently let the edge connect. And please, no storing knives tip-down in utensil holders. Use a magnetic strip, cork-lined drawer, or knife cover. <span style="font-weight: 500;font-size:20px">8. Serrated Blades Are Best For Acidic Foods</span> Acidity can corrode the blade edge, causing faster deterioration. Use serrated knives for tomatoes, lemons, and citrus fruits to preserve your other blades. There you have it, folks. Stop making these knife faux pas and start treating your kitchen like the gourmet sanctuary it’s meant to be. Happy chopping!

Kitchen Picks

Home&Garden

5 Real-Life IKEA Closet Storage Ideas Used by Our Editors

Hey, if you’re like me and constantly struggle with finding places for all those little things in your closet, can never find the right clothes or matching jewelry, lose socks, or deal with clothes falling out every time you open the closet door, then you’ll definitely want to check out these clever IKEA storage ideas.

Organization Tools

Introduction Of Modern Abode With a Collected, Vintage Feel

Inside a Modern Abode With a Collected, Vintage Feel Imagine stepping into a retro house where each room exudes a unique charm and timeless elegance. Let's explore the living room, kitchen, dining room, powder room, primary bedroom, primary bathroom, and laundry room, all styled to capture the essence of a bygone era.

Clever Food Pantry Organization Ideas to Keep You Clutter-Free

Group Foods by Type Think of your pantry like a grocery store—keep similar items together. Designate areas for breakfast foods such as cereals and oats, canned goods, condiments, and packaged items like pasta or rice. Pearce Design Group places canned drinks and non-food items lower down.

Organization Tools

8 Smart Home Organizing Tips

1. Vacuum unused items Putting unused items in a bag and vacuuming can greatly reduce the space occupied, which is very convenient.

Organization Tools

6 Way make Modern Kitchens Feel Warm, Gorgeous and Inviting

In today's modern living, the kitchen serves not only as a place for cooking but also as the heart of family life and social gatherings. Designing an elegant and modern kitchen can elevate the overall taste of your home and add enjoyment to daily living. Here are six key points to help you achieve this goal:

How to Fake a Spotless Home with 7 Lazy Hacks

Hey, my dear readers! Are you like me—lazy but still wanting a spotless-looking home, especially when friends visit on the weekends? I’ve compiled a few quick cleaning hacks for the lazy ones among us. You can also use these tips for daily maintenance because, let’s face it, even lazy folks like to have a tidy space. 1. Wipe Down Glass Surfaces Clean your coffee table, TV screen, and mirrors. Glass shows every speck of dust and fingerprints, so a quick wipe can make a big difference. 2. Hide Clutter in Baskets Use pretty woven baskets to temporarily stash away clutter. Place a blanket over the top to disguise the mess. Straighten up pillows and decor while you're at it. 3. Clean Kitchen Counters A clean kitchen is inviting. Sweep crumbs into a small brush pan set and vacuum the stove crevices. Spray multipurpose cleaner for a fresh scent. 4. Vacuum and Tidy Corners Quickly vacuum high-traffic areas and focus on corners where dust bunnies collect. Clean the baseboards too for a polished look. 5. Speed-Clean the Bathroom Swap out towels, wipe the mirror and faucet, and clean the sink and toilet. Hide countertop clutter in the medicine cabinet. 6. Take Out the Trash Empty trash cans to prevent odors. This small step makes a big difference in maintaining a clean vibe. 7. Open Curtains and Light a Candle Natural light makes spaces look cleaner. Light a candle for a welcoming scent. Close doors to rooms you don’t need to clean. With these tips, your home will look neat and tidy in no time, leaving you more time to enjoy with your guests.